Salesforce Schema Builder: Managing Salesforce SObjects Schema using Schema Builder
Looking for Salesforce Training & HandsOn Projects?
Schema Builder is another visual tool available on
the Salesforce Platform that enables users to work with Salesforce Schema in a
more efficient way than using web interfaces. It helps analyze complex data
models visually since it offers a canvas where we can analyze SObjects and
their respective relationships.
In this blog, we will unleash the power of Schema
Builder and the functions it offers to manage Schema.
Launch Schema Builder
To launch Schema Builder, go to Setup and search for
“Schema Builder”
Click “Schema
Builder” to launch it

On the canvas of Schema Builder, we can see the
following layer of elements-
Step-1: Shows toolbar that offers useful functions to work
with canvas & its items
Step-2: Shows the list of available SObjects under “Objects” Tab and Field Types under “Elements” Tab
Step-3: Shows “Data Model Visual Designer” where we can analyze the SObjects & their respective relationships. It also allows us to create, edit and delete SObjects & Fields.

Step-4: Shows a dropdown where we can filter based on SObjects
types (Standard/Custom/All), it helps to run a focused search on the available
sObjects in Salesforce Org

If click on “Elements”
Tab we can find all available Field Types supported by Salesforce Org, we can
use any of these supporting datatypes to add fields to the SObjects

The indicated icon shows the “Objects’ Settings Launcher”. This settings launcher allows us to
modify the SObjects’ properties, permissions and even delete the SObject all together
all at the same place.

Using the settings launcher we can manage the space
on the canvas by hiding irrelevant sObjects, which allows focusing on the
important SObjects.

Add New SObject
Step-1: Click on “Objects”
Table and drag and drop “Object” element on the canvas
Step-2: This will launch a “Create New Object” form. Fill the details as required and click
Save to create the new SObject


Edit SObject
Once saved successfully canvas will show a new SObject
created with default system fields
To edit the properties of the SObject follow steps
as shown below:
Step-1: Click settings launcher
Step-2: Click “Edit Object Properties”
This will launch “Edit Object” form, here you can make changes to the properties of
the SObject as required


Add Fields To SObject
Once SObject is created as per requirement it is
time to add fields to it as shown in the steps below:
Add Lookup Field
Step-1: Click on “Elements”
Tab
Step-2: Drag and Drop the field type you wish to add a
field for. Here I add a field of type “Lookup”.
Drag the “Lookup” Field Type and
drop it to the canvas
Step-3: This will launch “Create lookup Field” Form, fill the details are required and click “Save” to add the field to the SObject

Similarly, we can add more fields using different
available field types. Here a few examples for your reference:
Add “Checkbox” Field

Add “Currency” Field

Add “Date” Field

Add “Email” Field

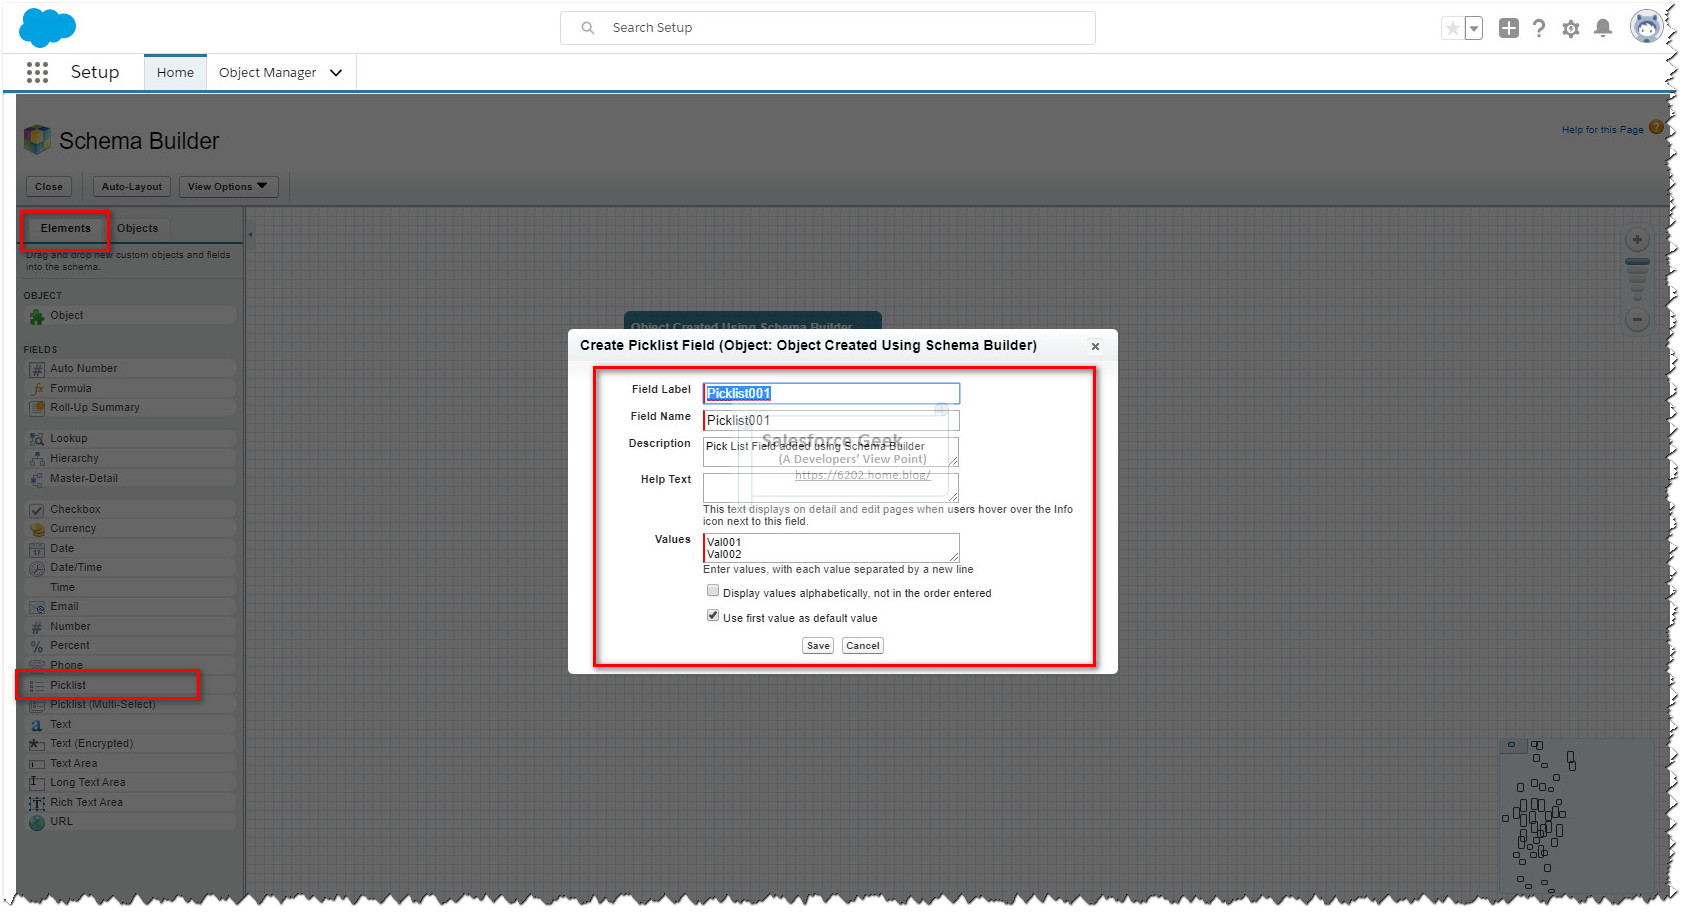
Add “PickList” Field
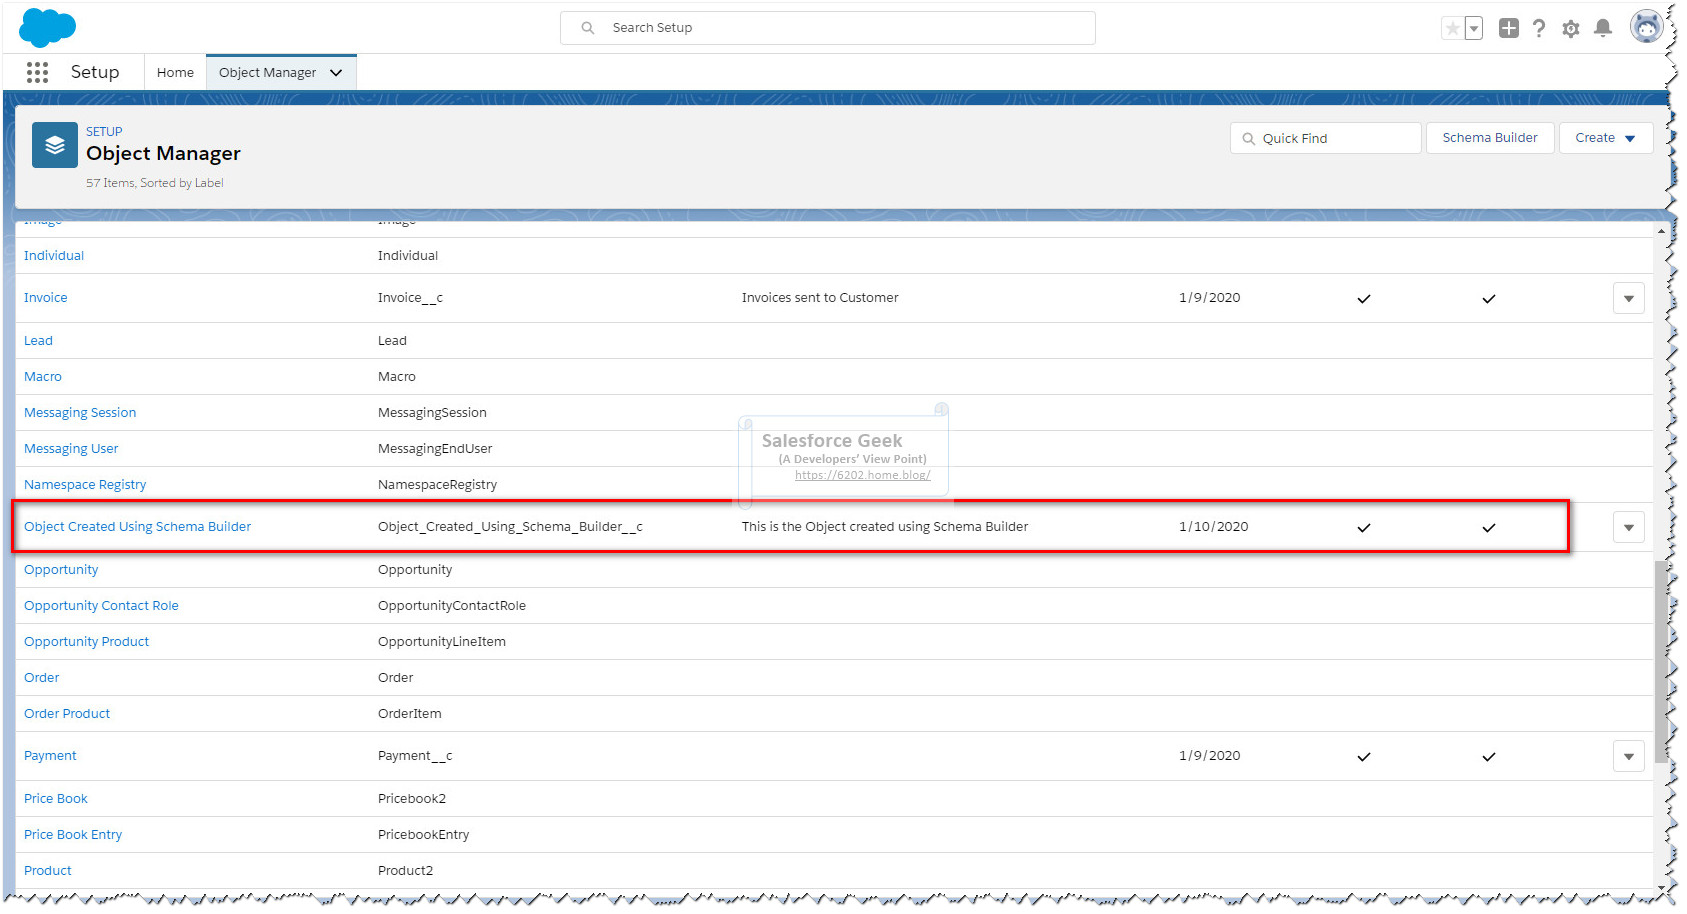
Once we are done with adding all the required
fields, we can move to “Object Manager”
and find this new SObject as shown below:
If we click on this custom SObject we can see the
basic details about it as shown below:

Now if we click “Fields
& Relationships” on the left, we can see all the fields added to the SObject as shown below:

This validates that the SObject and all the required
fields are added successfully.
Now lets’ go back to Schema Builder again and review
more of its features
Use the Search box to type in a few words from the
name of SObject we need to find as shown below:

Drag SObject from the search results on to canvas to
review the schema for it as shown below:

To edit the properties of any field just “Double
Click” it to open the “Edit
<FieldType>” forms where respective properties can be modified as
shown below:

Delete Fields From SObject
To delete the field from SObject definition follow
the steps below:
Step-1: Right-click on the field name
Step-2: Select “Delete
Field” from the context menu to delete the field

Salesforce does a wonderful job of educating users
wherever necessary, so as soon as you try to delete a field, you will get a
confirmation box with lots of important detail worth reviewing carefully as
shown below:

Here we have three important points to focus on as
mentioned below:
Point-1: The delete operation will impact all kind of
dependencies, be it a dependent SObject, Formula, Validation Rules or anything
else
Point-2: You should export the records to an external file
before deleting this field if it contains any data contributing to the record
to retain it for future reference
Point-3: You have 15 Days to undelete this field, and
restore the data associated with this field after that data will be lost
permanently.
I would recommend you to practice caution while deleting the schema as it may have some uninvited repercussions.
Delete SObject
To delete the SObject we need to follow the steps below:
Step-1: Click “Settings
Launcher”
Step-2: Select “Delete
Object” from settings

Practice caution while deleting SObjects and make
sure you read the confirmation box carefully before making any decision.

Show Relationship Option
Schema Builder provides a relationship analyzer that
is helpful to visually analyze the data model and associated relationships.

To enable the visual effects to click “View Option” dropdown in the toolbar
and select “Show Relationships”
toggle option as shown below:
As soon we enable “Show Relationship” feature, the visual effects turn on and we can
visually review the relationship among the sObjects as shown below:

Hope you enjoyed this article. Please leave
your comments to let me know how you do like the content and how you do find it
helpful to learn the topic.
Comments
Post a Comment