Omni-Channel: Skill Based Routing Part-4
Looking for Salesforce Training & HandsOn Projects?
Trailblazer Profile | LinkedIn | Salesforce Blog | Facebook | Youtube Channel | WhatsApp Community
In the previous article, you successfully constructed a powerful custom Case Routing Engine using Apex code (as covered in Demo Stages 8-9). This achievement equipped you to intelligently assign cases based on specific criteria.
Now, we'll embark on the next crucial steps in your journey towards a more streamlined and efficient support system (Demo Stages 10-11). This article will guide you through enabling an Omni-Channel Chatbox and putting your custom routing engine to the test with Skill-Based Routing. Buckle up, as we delve into these exciting functionalities!
Demo (Stage-10): Enable Omni Channel Chatbox
Preparation
- Ensure you have two Service Agent user accounts created and ready for login.

Enabling Omni-Channel
- Go To App Manager: Locate and access your platform's App Manager interface.
- Edit Service Console App: Find the Service Console App and open it for editing.


Add Omni-Channel Utility
- In the left navigation pane, locate and click "Utility Items".
- Click the "Add Utility Item" button.
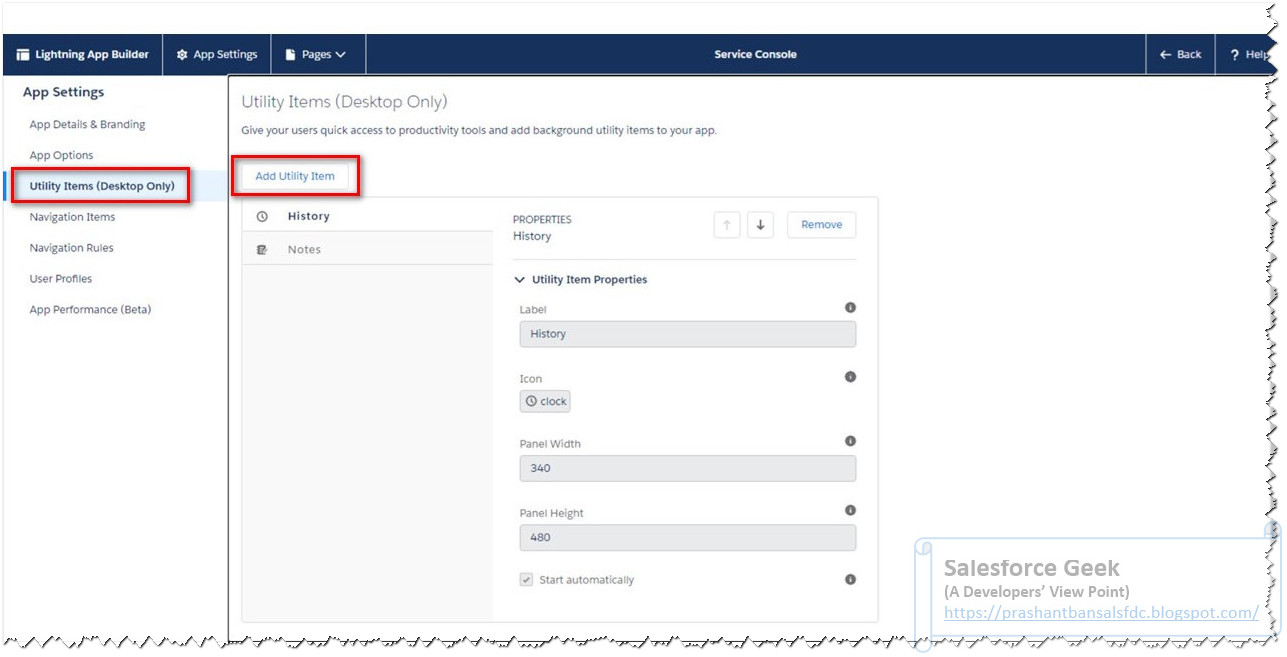
- From the list of Utility Items, select "Omni-Channel".
- Set Utility Properties: Configure the properties for the "Omni-Channel" Utility Item according to your platform's specific instructions.


- Launch Service Console: Utilize the App Launcher to open the Service Console App.
- Verify Omni-Channel Utility: Within the Service Console App interface, check if the "Omni-Channel" Utility is now visible.

Setting Agent Availability
- Login as Service Agent 1: Use one of your Service Agent accounts to log in to the Service Console App.
- Set Availability Status: Locate the option to set your availability status and choose "Available". This allows you to receive chat requests.


- Repeat for Service Agent 2: Logout and then log in using your second Service Agent account. Repeat step 2 to set their availability to "Available" as well.


Dual-Monitor (Screen Split) Setup (Optional)
Arrange your two monitors such that you can see both Service Agent consoles side-by-side on the same screen. This allows you to easily manage chats from both agents simultaneously for testing purposes.
Demo (Stage-11): Test Skill Based Routing
Scenario
We will simulate cases requiring different skillsets (Accessories vs. Fuel) and observe how the routing engine assigns them accordingly.
Testing with "Accessories"
- Create Case Record: Access the case creation interface within your platform.
- Set Subject Line: Briefly describe the case, for example, "Inquiry about Phone Case".
- Set Case Description:
- Include details about the case.
- Crucially, include the word "Accessories" in the description. This keyword will trigger the skill-based routing.
- Save Case: Finalize and save the newly created case.


Observe Routing (Accessories)
- The custom routing engine should analyze the case description containing "Accessories".
- Based on this keyword, the engine should identify the agent with the "Accessories" skill set (if configured).
- The case will be routed to the designated agent's queue.

Agent Action (Accessories)
- Login as Agent with "Accessories" Skill: Use the credentials for the agent assigned to handle accessory-related cases.
- Check Work Queue: Locate the queue where incoming cases are displayed.
- Accept Case: Identify the case related to accessories and choose the option to "Accept" it as a work item.

Testing with "Fuel"
- Repeat Steps 1 & 2: Create a new case record with a relevant subject line (e.g., "Car Trouble - Refueling Issue").
- Set Case Description:
- Include details about the case.
- Crucially, include the word "Fuel" in the description to trigger routing based on a different skillset.
- Save Case: Finalize and save the newly created case.

Observe Routing (Fuel)
- The custom routing engine should analyze the case description containing "Fuel".
- Based on this keyword, the engine should identify the agent with the "Fuel" skill set (if configured).
- The case will be routed to the designated agent's queue.
Agent Action (Fuel)
- Login as Agent with "Fuel" Skill: Use the credentials for the agent assigned to handle fuel-related cases.
- Check Work Queue: Locate the queue where incoming cases are displayed.
- Accept Case: Identify the case related to fuel and choose the option to "Accept" it as a work item.

Comments
Post a Comment